Mitten Siding Installation Guide for Homeowners and Pros
A practical mitten siding installation guide begins with one lesson I learned after inspecting warped vinyl panels on a sun-baked colonial in Ohio: vinyl siding hangs, it never gets nailed tight. Mitten manufactures thick, rich-colored vinyl profiles in Brantford, Ontario that look crisp right off the pallet. Yet driving fasteners flush against the nailing hem turns an entire wall into a wavy mess by mid-July.
Homeowners typically pay $6 to $11 per square foot installed for Mitten Sentry or Highland panels in 2026. Spending that money pays off only when your crew respects thermal expansion and moisture drainage rules. Below is the exact field checklist I use to verify clean siding layouts before the first starter strip goes up.
Mitten Siding Installation Guide — Overview
Mitten extrudes heavy-duty polyvinyl chloride panels ranging from 0.042 to 0.046 inches thick, depending on the product tier you pick. Because dark pigments like Muskoka Green or Gunmetal Grey absorb intense solar heat, a 12-foot plank can expand or contract up to half an inch across seasons. Every rule in Mitten’s technical manual exists to let those panels slide freely without buckling.
Key facts to know first
Panel thickness and color heat absorption
Thicker gauges like Mitten’s 0.046-inch Sentry line resist wind flutter and hide minor wall framing waves far better than builder-grade 0.040-inch stock. Dark shades feature proprietary Chromashield technology to resist ultraviolet fading, though they still expand faster under afternoon sun. Always store boxed panels flat on a level surface away from direct blacktop heat prior to hanging.
Mandatory nailing hem clearance
Each fastener must sit dead center inside the elongated factory slot with a strict 1/32-inch gap between the nail head and the vinyl surface. You should be able to slide a completed course sideways by hand after driving every nail. If a panel feels locked tight against the sheathing, pull that fastener immediately and try again.
What most people get wrong
Nailing through the face of the vinyl
Some hurried crews drive finish nails directly through the vinyl face near window casings to stop rattling. Face-nailing pins the plank in place and forces the vinyl to buckle outward during warm weather. Proper J-channel pockets and utility trim hold cut edges securely without piercing the panel face.
Overlooking roofline flashing and upper water shedding
Water pouring off an un-flashed roof edge stains and damages new siding within a single rainy season. Before hanging upper gable courses, check adjacent eaves and review your roof replacement definition if drip edges or fascia boards show rot. Kickout flashing must sit tightly at the bottom of every roof-to-wall intersection so water dumps straight into the gutter.
Pulling panels upward too hard while locking
Yanking a vinyl plank upward until the bottom lock stretches tight causes oil-canning and distorts the woodgrain shadow line. Lift each course just enough to engage the lower lock cleanly, then let the panel rest naturally on its own weight. Stretching panels also pulls the nailing hem out of alignment and creates uneven horizontal reveal lines across long walls.
Preparing Exterior Walls and Selecting Hardware
Housewrap, sheathing, and furring checks
Weather-resistive barrier setup
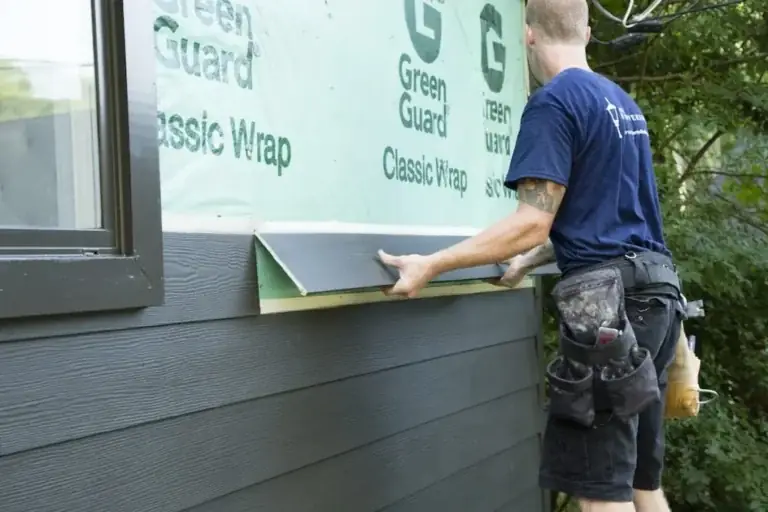
Vinyl siding is an exterior rainscreen, not a waterproof seal, because wind-driven rain enters through weep holes and lap joints. Cover clean OSB or plywood sheathing with a breathable housewrap, overlapping horizontal seams by at least six inches. Tape every vertical seam and window flange carefully so water drains harmlessly down the membrane.
Leveling uneven wall substrates
Old clapboards or bowed wall studs telegraph straight through thin vinyl panels if you skip prep work. Install rigid foam fanfold underlayment or vertical furring strips over wavy framing to create a flat plane. Smooth substrates keep horizontal shadow lines crisp from sunrise through late afternoon.
Fastener specs and job-site tool list
Corrosion-resistant nail standards
Use aluminum, galvanized steel, or stainless steel roofing nails with a minimum 5/16-inch head diameter and a 1/8-inch shank. Fasteners must penetrate at least 3/4 inch into solid wood framing or structural sheathing, never just foam board. Staples are allowed only if they are corrosion-resistant and leave the exact same 1/32-inch expansion clearance.
Essential materials for a clean Mitten install
-
1.5-inch to 2-inch galvanized or aluminum roofing nails with wide flat heads
-
Galvanized steel or heavy-duty vinyl starter strips with pre-punched weep holes
-
3/4-inch or 1-inch J-channel for windows, doors, and roofline transitions
-
Snap-lock punch tool for creating locking tabs along trimmed top courses
-
Nail hole slot punch for extending factory slots on short cut pieces
Step-by-Step Mitten Siding Installation Guide Layout
Starter strips, corners, and expansion gaps
Snapping a true level baseline
Measure down from the soffit at several points around the house to check whether your foundation sits level. Snap a continuous chalk line roughly 1.25 inches above the bottom of your sheathing, then fasten the starter strip every 10 inches. A level starter course keeps every subsequent row straight all the way up to the gable peak.
Corner posts and receiving channel clearances
Install inside and outside corner posts first, leaving a 1/4-inch gap beneath the soffit for vertical expansion. Hang the corner post from the top slot on both sides, then center nails every 10 to 12 inches down the remaining slots. Leave a strict 1/4-inch clearance between every vinyl plank end and the inside pocket of your corner posts or J-channels, increasing that gap to 3/8 inch if you install in temperatures below 40°F.
Overlapping seams and top-course finishing
Staggering factory-notched overlaps
Overlap adjacent panels by roughly one inch, using the factory-cut notches so the butt joint sits flat against the wall. Stagger vertical lap joints by at least 24 inches between courses, and never stack seams directly above or below windows. Face overlaps away from your main driveway or front walkway so sightlines hide the vertical seam edges.
Finishing beneath soffits and windows
Measure the remaining space under your soffit or window sill, then trim the final panel lengthwise with sharp aviation snips. Punch raised locking tabs every six inches along the cut top edge using a snap-lock punch. Snap those tabs firmly into the undersill trim so wind suction never rips the top row loose.
Coordinating Exterior Upgrades and Storm Repairs
Planning roof and siding timelines together
Scheduling exterior trades in the right order
Stripping old shingles drops heavy debris and stray nails directly along your exterior walls. Homeowners planning major exterior renovations often study the full roof replacement meaning before booking siding installers, because completing roof work first protects fresh vinyl panels from ladder dents and falling tear-off trash. Proper trade sequencing also lets roofers install step flashing cleanly before siding crews cover the wall.
Navigating hail claims and insurance endorsements
Wind-driven hail frequently cracks older vinyl panels on the same elevation where shingles lose protective granules. If a storm damages both your roof and wall cladding, review your policy’s roof replacement coverage per endorsement meaning alongside your siding matching rules so adjusters account for discontinued colors or profiles. According to the Vinyl Siding Institute Installation Manual, following certified ASTM D4756 installation standards protects your manufacturer warranty against wind blow-off disputes.
Frequently Asked Questions
How much does a mitten siding installation guide project cost per square foot?
Expect to pay $6 to $11 per square foot installed for Mitten vinyl siding in 2026, depending on panel thickness and home height. Material costs alone run roughly $2.50 to $4.50 per square foot for standard horizontal profiles, while trim accessories, housewrap, and labor make up the rest.
How much gap should you leave at the ends of Mitten vinyl siding?
Leave a 1/4-inch expansion gap between panel ends and all corner posts or J-channels during warm weather. If you install siding when outdoor temperatures drop below 40°F, widen that gap to 3/8 inch so summer heat never forces the vinyl to buckle.
Can you install Mitten vinyl siding over existing wood siding?
Yes, you can install Mitten siding over flat, sound wood clapboards after nailing down loose boards and scraping peeling paint. You must apply rigid foam underlayment or furring strips first so the new vinyl panels sit on a smooth, level plane.
What nail spacing is required for Mitten vinyl siding?
Space nails every 16 inches on center along horizontal courses, centering each fastener inside the factory nailing slot. Vertical accessories like corner posts and J-channels require fasteners spaced every 10 to 12 inches, hung from the top slot first.
Final Steps Before You Order Materials
Using a dependable mitten siding installation guide keeps your exterior walls straight, weather-tight, and covered under Mitten’s lifetime warranty. Focus on leaving proper 1/4-inch expansion gaps, centering nails with a 1/32-inch gap, and sealing your housewrap seams before snapping a single course. Measure your wall square footage plus a 10 percent waste allowance today, then verify every contractor quote lists proper galvanized fasteners and undersill trim in writing.